
Shop the edit
View collection


If you’ve ever wondered which self tan will look the most skin-real on you—and fit gracefully around your lifestyle—you’re in the right place. As a skincare-led tanning house, we believe a flawless bronze begins before you open the bottle and continues long after you’ve rinsed the guide colour away. This expert guide walks you through undertones, textures, shades, prep, application and maintenance, so your glow looks effortless day one and skin-loving every day after.
Why choosing the right self tan matters
Self tan is not one-size-fits-all. Your ideal formula depends on your skin type, your undertone, how you like to apply, how quickly you want to develop colour and whether you’d prefer a wash-off tint or a lasting tan. Selecting the right option means a softer fade, a more convincing shade and a finish that looks like it belongs to your skin—never sitting on top of it.
Know your undertone (and why it changes everything)
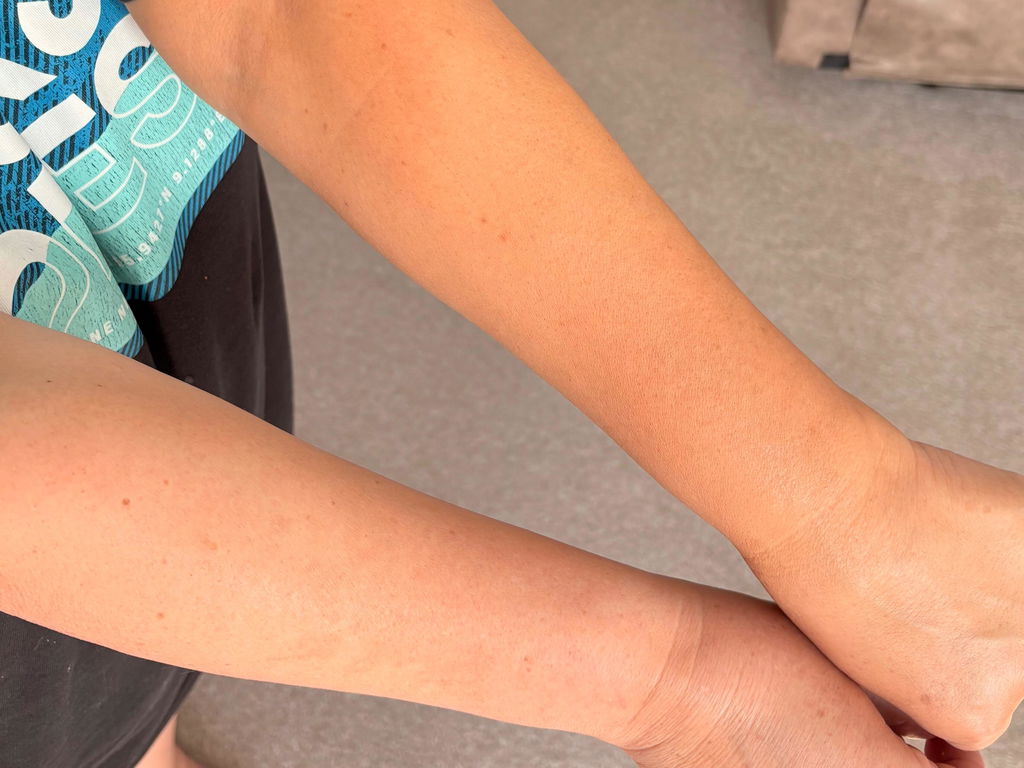
Your undertone is the subtle hue beneath your skin’s surface. It doesn’t change with seasons and it influences how colour reads on your complexion.
- Cool undertones: Your skin leans rosy or bluish. Silver jewellery tends to flatter; veins often look blue or purple.
- Neutral undertones: You sit between warm and cool. Both gold and silver jewellery look equally good; veins may appear a mix of green and blue.
- Warm undertones: Your skin leans golden, peachy or olive. Gold jewellery is especially flattering; veins may appear greenish.
How this helps with self tan: cool undertones usually look best in tans with a softly olive or neutral base that dials down orange. Warm undertones can carry golden or caramel tones beautifully. Neutral undertones are flexible—aim for balanced, natural shades.
Undertone tips in practice
- If fair with cool undertones, start with a light to medium tan or a gradual lotion to build colour slowly.
- If medium with neutral undertones, try a medium tan mousse or clear tanning water for a natural, weekend-in-the-sun look.
- If deep with warm undertones, opt for a medium to dark tan that brings depth and radiance without dulling golden notes.
Remember: shade names are only a guide. Always test a small area first, and tailor your development time to your preference.
Choose your texture and format
Different textures behave differently on skin—and each one has unique benefits.
Tinted mousse (with guide colour)
Best for: Visual confidence during application, those learning to tan, or anyone who needs a strong result in one go.
- Why you’ll love it: The guide colour helps you see where you’ve applied, so you can blend seamlessly. The airy texture is quick to apply with a tanning mitt, and it typically develops into a reliable, even finish.
- Skincare tip: If you’re dry, layer a lightweight, oil-free moisturiser onto elbows, knees and ankles before application to soften absorption.
Clear tanning water (untinted)
Best for: No-transfer convenience, minimal mess, and confident tanners who don’t need a guide colour.
- Why you’ll love it: Goes on clear, feels ultra-light and typically dries fast. Ideal for daytime application under loose clothing when you want to avoid any tint on fabrics.
- Technique tip: Work in sections under good lighting and apply methodically with a mitt to ensure full coverage.
Gradual tanning lotion
Best for: Absolute beginners, fair skin tones, or skincare lovers who prefer subtle, buildable glow.
- Why you’ll love it: Doubles as daily body care while slowly adding colour over 2–4 days of use. Perfect for “maintenance weeks” between deeper tans.
- Routine tip: Use every other day to keep depth steady; add an extra layer before weekends or events.
Face-specific self tan
Best for: Complexions that want skincare-led ingredients with a breathable, refined finish.
- Why you’ll love it: Face formulas are typically designed for delicate skin and pair well with serums and moisturisers. Use a mist, serum or drops for custom depth.
- Application tip: Blend into your hairline, over and behind the ears, and down the neck to the collarbones for a seamless match.
Wash-off body makeup
Best for: One-night-only polish and instant perfection.
- Why you’ll love it: Delivers a soft-focus tint, blurs the look of tone irregularities and rinses off with soap and water. Ideal for evening wear, photos or when you need a “just-tanned” effect without commitment.
If you love instant, red-carpet legs, Vita Liberata Body Blur is the ultimate skin-finisher for a high-definition, wash-off glow. For complexion, Beauty Blur helps to add radiance and soft-focus finish to your makeup look.
Match your tan to your lifestyle
If you train or swim often
Choose a formula that dries quickly and is comfortable on active days, such as a clear tanning water or a lightweight mousse. After workouts, rinse sweat promptly and pat dry rather than rubbing. Maintain with a gradual lotion between full applications.
If you’re time-poor
Opt for a tinted mousse for one-and-done colour or a face mist you can sweep on in seconds. Keep a wash-off body makeup on hand for instant polish when plans pop up.
If you have a big event
Tan 48 hours before so your colour can settle, then top with Body Blur just before you dress to refine the skin’s finish. For face, choose a dedicated face tan a day ahead, then add Beauty Blur under foundation for softly lit radiance.
Prep like a pro: the 48-hour plan
Flawless tan is built on consistent prep. Here’s a skin-friendly schedule to follow.
48 hours before
- Exfoliate with a gentle, non-oily scrub or a soft mitt to smooth away rough spots. Focus on elbows, knees, ankles, heels and the tops of feet. Rinse thoroughly.
- Hydrate skin with a simple, oil-free lotion to cushion dryness. Well-hydrated skin absorbs tan more evenly.
24 hours before
- Hair removal: If shaving, do it at least 12–24 hours ahead to allow follicles to settle, reducing the risk of dots. If waxing, allow 24–48 hours.
- Moisturise lightly: Keep skin soft but avoid heavy, occlusive oils that may block tan adhesion.
On tan day
- Shower, then cool down: Rinse skin and cool it before applying to minimise open pores and perspiration.
- Skip oil-based products and deodorant on application areas to prevent interference.
- Spot-moisturise “grabby” zones: Elbows, knees, ankles, knuckles and cuticles should get a whisper of lotion to diffuse absorption.
Application technique: body
A tanning mitt is your best friend for smooth application and stained-hand prevention.
- Work in sections: Lower legs, upper legs, torso, lower arms, upper arms, back. Use long, sweeping strokes, then small circles to blend.
- Use less on dry zones: Whatever is left on your mitt after each section is enough for hands, feet, elbows and knees.
- Blend boundaries: Feather around wrists and ankles. Wipe nails and cuticles with a barely damp cotton pad to prevent build-up.
- Back application: Flip the mitt on your hand and reach both shoulders, then use the mitt’s edges to blend down the spine. A flexible back applicator can help.
Hands and feet—making them believable
- Apply a pea-sized amount of regular lotion to knuckles, the sides of fingers, the heel of the hand and cuticles.
- Use leftover tan from your forearms to sweep over the tops of hands and blend between fingers. Flex your fingers while blending to avoid pale creases.
- For feet, point toes and lightly sweep over tops with the residual product from your calves. Avoid soles and nails.
Application technique: face
For the most natural result, treat your face as you would your skincare routine—thin, even layers and patience.
- Prep: Cleanse, tone and lightly moisturise. Allow skincare to fully absorb and skin to dry.
- Choose your format: A face mist is quick and even; serum or drops can be mixed with moisturiser for custom depth.
- Blend thoroughly: Move from the centre of the face outward, across hairline and ears, and down the neck and décolletage for continuity.
- Brow and hair caution: Wipe through brows with a clean spoolie and along the hairline with a cotton bud to prevent catching.
Development time and rinsing
Always check your formula’s guidance, but here’s a general rule of thumb:
- Light colour: 1–2 hours before rinse.
- Medium colour: 3–4 hours before rinse.
- Dark colour: 6–8 hours or overnight before rinse.
When you rinse, use lukewarm water only—no soap for the first rinse—and pat skin dry. Colour will continue to develop over the next 8–24 hours.
Maintaining your glow
Maintenance keeps colour even and your skin comfortable.
- Hydrate daily: Apply a simple, oil-free body lotion after showering to prevent patchiness as skin naturally sheds.
- Top up gradually: Use a gradual tan lotion every other day to smooth fade and boost radiance.
- Protect your investment: Chlorine, long hot baths and heavy exfoliation can shorten tan life. Rinse after swimming and keep showers warm, not hot.
- Strategic exfoliation: At day 5–7, gently buff drier areas before you reapply tan to ensure an even base.
Choosing shade depth: by skin tone
Let natural skin depth guide your choice, then fine-tune by undertone.
Fair to very fair
- Start with light or gradual. Add a second layer the next day if needed.
- Neutral or olive-leaning formulas can help avoid an orange cast.
Light to medium
- Light–medium for weekday polish; medium for event-ready glow.
- Adjust with development time: rinse earlier for softer colour, later for more depth.
Olive to deep
- Medium–dark can enhance warmth, add dimension and even tone.
- Focus on luminosity and evenness rather than going significantly darker.
Self tan for different skin types
Dry or dehydrated
- Choose creamy lotions or hydrating mousses.
- Pre-load moisture on elbows, knees, ankles and hands.
- Maintain with gradual lotion to reduce patchy fade.
Oily or blemish-prone
- Opt for lightweight mousses or clear waters that feel breathable.
- Keep pre-tan skincare oil-free and non-comedogenic.
Sensitive
- Patch test 24–48 hours in advance on a small area.
- Choose gentle formats and keep routines simple on tan day.
Problem-solving: common tan challenges
Streaks or missed patches
- Quick fix: Dab a little gradual lotion on a cotton pad and buff the pale area in small circles. Let it develop; repeat if needed.
- Prevention: Work in good light, in sections, and use a mitt for even glide.
Too dark
- Quick fix: Take a warm shower and use a soft cloth with a gentle body polish on the deepest areas. Follow with a light layer of body lotion to even the fade.
- Next time: Shorten development time or move one shade lighter.
Patchy fade on shins or forearms
- Quick fix: Even out with Body Blur for the day; long term, gently exfoliate and layer a gradual lotion nightly for three days.
Hands too dark
- Quick fix: Mix a pea of regular lotion with a small amount of exfoliator and lightly buff the knuckles and sides of fingers. Rinse and rehydrate, then mist a touch of face tan onto the tops if needed.
When to choose wash-off vs lasting tan
Wash-off body makeup is instant gratification: apply, blur, glow, rinse. It’s perfect for events, photos and unpredictable weather. A lasting self tan builds depth you can wear for days, then enhance with a wash-off tint when you want extra camera-ready polish. They’re beautiful together: tan two days before, then finish with Body Blur on show areas for a high-definition sheen.
Face-first: a week-long glow plan
- Sunday: Exfoliate gently, then apply a face-specific tan. Sleep and wake to fresh radiance.
- Tuesday: Add a light top-up using a mist or a drop or two mixed into moisturiser.
- Thursday: Refresh with another light layer if needed. Keep hydration consistent.
- Saturday: For evenings out, smooth on Beauty Blur before makeup for a soft-focus, lit-from-within base.
Seasonal tanning strategy
Spring
Ease in with gradual lotion on limbs and a face tan for morning freshness. Choose light shades that read like the first hint of sun.
Summer
Switch to a tinted mousse or clear tanning water in a medium shade for higher-impact colour. Maintain with every-other-day hydration and weekly gentle exfoliation.
Autumn
Dial back depth but keep luminosity. Blend a single layer of your favourite formula and rely on Body Blur for evenings out.
Winter
Keep skin-comfort front and centre. Choose hydrating formulas and soft, light-to-medium depth for a healthy, cosy glow under knitwear.
Event countdown: 7-day glow timeline
- T–7 days: Start gentle exfoliation every other day. Hydrate daily.
- T–3 days: Apply your chosen lasting tan (tinted mousse for confidence or clear water for no-transfer convenience).
- T–2 days: Assess colour. Add a light top-up if you want more depth.
- T–1 day: Hydrate. If needed, gently buff and reapply a thin layer to any pale areas.
- Event day: Shower, moisturise lightly, and finish with Body Blur on limbs and Beauty Blur on the face for photo-ready finish.
Smart wardrobe choices while your tan develops
- For tinted formulas: Choose darker, loose-fitting clothing, and avoid tight waistbands or bras that could create lines.
- For clear formulas: Opt for breathable, gentle fabrics and avoid heavy sweating for the first few hours.
- Overnight tips: Sleep on darker bedding or place a towel over your pillow the first night, just in case of transfer from tinted formulas.
How to remove old tan gently
Build-up happens. To reset your canvas without over-exfoliating:
- Soak and soften: Take a warm (not hot) bath or shower to soften skin.
- Buff carefully: Use a soft exfoliating mitt with light pressure, focusing on areas of build-up. Keep movements short and gentle.
- Rebalance moisture: Finish with a hydrating, oil-free lotion and rest your skin for a day before reapplying tan.
Vita Liberata favourites to explore
While we’ve kept this guide product-agnostic to help you choose by need, here are a few Vita Liberata options our community loves to reach for, depending on the moment:
- Tinted self tan mousse: A go-to for visible application and event-ready depth.
- Clear tanning water: For no-tint convenience and quick-dry comfort.
- Gradual tanning lotion: For subtle, buildable glow and maintenance.
- Face-specific tan (mist, serum or drops): For controlled, skincare-led radiance.
- Body Blur: Wash-off, soft-focus body tint for instant perfection.
- Beauty Blur: Radiant, soft-focus base to complement your face tan.
Explore the full Vita Liberata range at vitaliberata.co.uk and discover the formats and depths that suit you best.
Final glow wisdom
The most believable tan is personal: it respects your undertone, your skin type and your schedule. Start softly, refine your prep and application, then maintain with hydration and light top-ups. Keep a wash-off tint on standby for instant polish and let your lasting tan do the day-to-day heavy lifting. With a little practice, your routine will feel as intuitive as your skincare—and your glow will look like it was always yours.