
Shop the edit
View collection


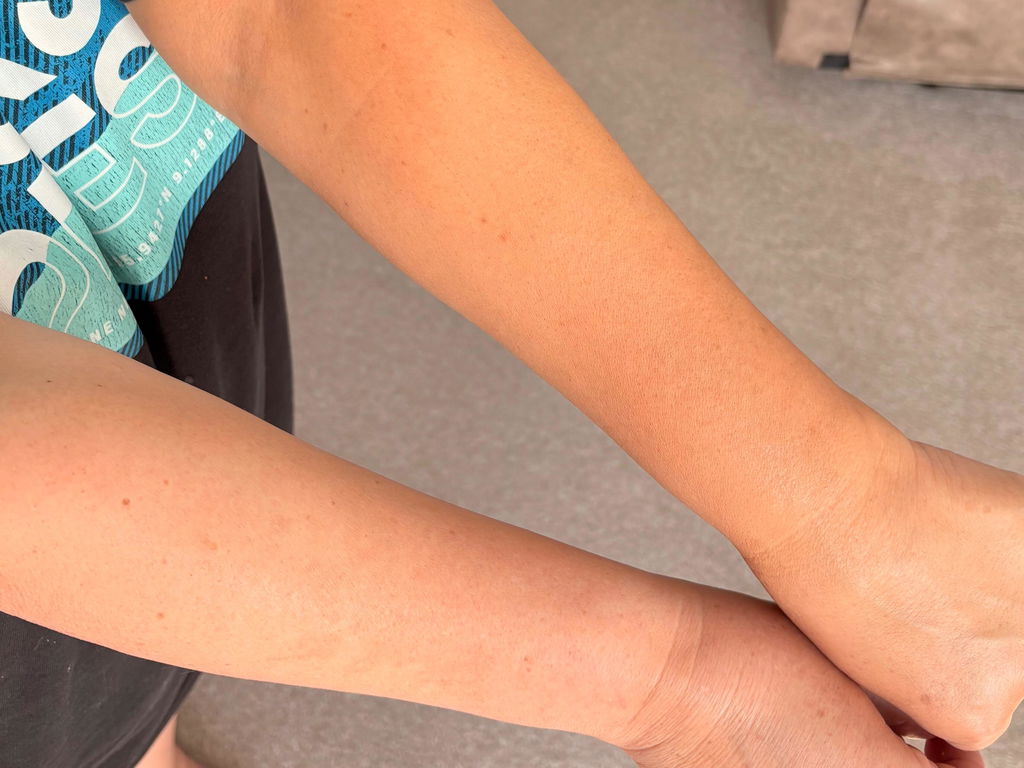
Patchy tan has a habit of showing up where it’s least welcome: on dry hands after washing up, around the ankle bones, or clinging to elbows and knees. If you’re reading this with a streak you didn’t plan for, breathe. With a little know-how and the right touch, you can soften harsh lines, re-balance depth and restore a believable glow — often in minutes. Here’s our expert, skin-first approach to rescuing a patchy self tan, plus prevention tips so it stays even from first application to final fade.
Why fake tan goes patchy (and what this tells you about the fix)
Self tan interacts with the uppermost layer of your skin — the stratum corneum — which is made up of dead skin cells that naturally shed. Anywhere that skin is drier, rougher or more textured (knuckles, wrists, elbows, knees, ankles, tops of feet) tends to grab more colour and hold on for longer. Daily habits also matter: hand washing, hot showers, gym leggings, tight waistbands and retinol acids can accelerate fade in some places and not others, creating unevenness.
Understanding that patchiness is a texture-and-turnover issue helps you fix it kindly: smooth the texture, rebalance the colour, then seal in moisture so fade becomes uniform.
Immediate rescue: a realistic timeline
If your tan has just developed and you spot streaks within the first hour
- Gently buff, don’t scrub. Take a slightly damp, soft washcloth and buff in small circles over the darker patches. This softens edges without stripping the surrounding colour.
- Feather with a pea-sized amount of lotion. A touch of your usual body lotion on the driest points (knuckles, inner wrists, around the ankles) can blur harsh lines quickly by softening the tan where it grabbed.
- Diffuse with a clean mitt. Use a clean, dry tanning mitt to sweep over any edges, pulling the existing colour into the lighter area with long, light strokes.
If the tan is fully developed and looks uneven
- Soften the top layer first. A lukewarm shower (not hot) followed by gentle circular buffing will partially lift excess colour on textured zones. Avoid vigorous exfoliation on a single spot; it can create new borders.
- Use a dedicated remover on mistakes. Where build-up is stubborn — inside elbows, around ankles or on the palm edge — apply a tan remover to clean, dry skin, leave briefly, then massage off in the shower. For targeted corrections, THE REMOVER is designed to help lift old or uneven tan so you can restart evenly, without over-scrubbing.
- Re-tint with a feather-light hand. Once the area is evened out, top up the lighter parts with a small amount of your usual tan using a clean mitt or brush, blending outward past the edge of the patch to avoid a tide mark.
Overnight perfecting
- Moisture is your best friend. A rich, fragrance-free moisturiser applied generously to wrists, knees and ankles will soften the stratum corneum overnight so any residual depth releases more evenly at your next shower.
- Micro-top-up for balance. If, after softening, you still have a pale window on one shin or forearm, blend a thin layer of gradual tan over that specific area rather than re-tanning the entire limb. A buildable formula such as THE GRADUAL TANNING LOTION lets you nudge depth gently and stop when it matches.
Targeted fixes: hands, wrists and knuckles
Hands develop fast, fade fast and advertise every little mistake. The trick is tiny amounts, well blended, and a pause for dry time before you touch anything.
- If too dark: Massage a small amount of hand cream into your knuckles and between fingers, then buff with a soft cloth. If needed, use a little of THE REMOVER on a cotton pad to lift excess on the knuckle caps and inner wrist, then rinse and pat dry.
- If too light: Mix a half-pea of gradual tan with hand cream and apply to the back of hands only, making a loose fist to avoid build-up in the creases. Feather towards the wrists and stop at the palm line. Try THE GRADUAL TANNING LOTION for this low-risk blend-and-go step.
- For wrist rings and watch marks: Remove the line lightly with remover, let the skin dry, then apply a whisper of gradual tan over and just beyond the area to rejoin the colour.
Elbows and knees: soften first, blend second
These hinge points are naturally drier and more textured. Colour collects in micro-folds, so you’ll often see darker halos here even when the rest looks perfect.
- Soak and soften: Take a brief lukewarm shower, then on clean, dry skin, massage a thin layer of a tan remover over the halo, wait as directed, and buff away in gentle circles. THE REMOVER helps to dissolve old colour so you can start again with a more even canvas.
- Re-apply sparingly: When topping up, apply to the surrounding area first, then use the residue on your mitt to pass once over the elbow or knee. This gives a naturally lighter centre where skin is thickest, which reads more real.
- Hydration habit: Keep a small tube of moisturiser near the sofa or desk and dab onto these areas daily. Consistent moisture is what stops future build-up.
Ankles and feet: the art of the fade
The ankle and foot area mixes multiple textures — smooth shin, bony ankle, tendons, drier heel — so it’s easy to overdo it. Aim for a gradient rather than full coverage.
- To erase a “sock line”: Gently lift the darker edge with a remover, rinse, then apply a thin veil of gradual tan across the paler zone. Pull the colour up the shin by a hand’s breadth so the transition is imperceptible.
- To correct dark tendons and around bones: Dab moisturiser onto any raised or very dry points first. Then, with a nearly-dry mitt, sweep any remaining tan across the top of the foot once, like a finishing glaze. Avoid the sides of the feet; they tan faster and fade slower.
- Heel care: If the heel is noticeably darker, focus on hydration twice daily for three days and the colour will naturally release. Scrubbing can create a new border.
Shins, forearms and the “patchy fade”
Gym leggings, jeans and exfoliating acids in body products can accelerate fade on shins and forearms, leading to lighter patches or vertical streaks.
- Simplify your body routine for 48 hours. Pause AHAs/BHAs and retinoids on body. Use a gentle, pH-balanced cleanser and lukewarm water while you rebalance.
- Re-tint with a gradual formula. A single, even layer of THE GRADUAL TANNING LOTION across the entire lower leg or forearm restores overall harmony without risking stripes.
- Fabric friction matters. Choose looser, breathable fabrics while your colour resets. Repeated tight seams can literally rub away tan in stripes.
How to re-start cleanly when everything looks uneven
Sometimes the kindest route is a gentle, all-over reset. Here’s a skin-first way to do it without leaving skin aggravated.
- Evening one: On dry skin, apply a tan remover from shoulders down and wait as directed. Step into a lukewarm shower, massage in circular motions with a soft cloth, then rinse well.
- Moisture overnight: Apply a fragrance-free body lotion or oil to damp skin. Focus on elbows, knees, ankles and hands.
- Evening two: Once skin is dry, reapply your self tan, using light pressure and long, overlapping strokes. Work limb by limb and check your edges in natural light before you wash your hands.
If you prefer a slower, zero-stress approach, build back gradually over a few days with THE GRADUAL TANNING LOTION. This offers exquisite control and a more forgiving blend on trickier areas.
Application techniques that prevent patchiness
Prep that pays off
- Exfoliate 24 hours in advance. A dedicated exfoliating mitt used with light pressure refines texture so tan applies smoothly the following day. Avoid over-exfoliating the day of application; it can make skin thirsty and grabby.
- Moisturise key zones. Just before tanning, pat a thin layer of lotion on knuckles, cuticles, elbows, knees, ankles and any very dry patches. This acts as a subtle barrier so those areas develop slightly lighter and more natural.
Small amounts, spread far
- Load the mitt lightly. Work in a teaspoon at a time per limb and add more only as needed. It’s far easier to deepen than to erase.
- Feather your edges. As you reach wrists and ankles, press more lightly and use sweeping motions past the edge to avoid a tide mark.
- Hands last. Use the residue on the mitt for the backs of hands. Make a loose claw to avoid pooling in the creases and stop at the palm line.
Let it dry, then live your life
- Clothing choice matters. After application, wear loose, breathable fabrics. Avoid socks, boots, sports bras and waistbands that cling for at least the first few hours.
- Water and steam are development disrupters. Delay hand washing, showers and intense workouts until your tan has fully developed, then rinse with lukewarm water.
Maintenance: keep an even fade day after day
- Hydration rhythm. Daily moisturiser keeps the upper skin layers pliable so they shed uniformly. Focus on dry-prone areas morning and night.
- Gentle cleansing. Switch to a mild body wash and lukewarm showers. Very hot water and sulphate-heavy cleansers can lift colour faster and irregularly.
- Smart top-ups. Rather than a full re-tan, maintain tone with light, alternate-day coats of THE GRADUAL TANNING LOTION. This approach minimises build-up and makes patchiness far less likely.
Shade and formula: small tweaks, better results
Choosing a depth that suits your undertone and current skin condition makes a tangible difference to evenness.
- When in doubt, go lighter and layer. Building to your ideal depth over two or three days creates a smoother finish on drier skins than a single, deep coat.
- Match your routine to your week. If you have a busy few days with lots of hand washing, plan to use gradual tan for hands and forearms, and your usual mousse or lotion elsewhere.
The kindest way to fix a face tan mishap
Facial skin is thinner and often on active skincare, so tread gently.
- Lift, don’t scrub. A soft, oil-based cleanse can coax away excess colour. Avoid abrasive exfoliation that can create pale patches around the nose and chin.
- Re-tint strategically. Mix a half-pea of your face tan with moisturiser and apply to the perimeter of the face and high points only, blending inward. This keeps the centre light and natural while evening tone.
- Pause strong actives for 48 hours. Temporarily skipping AHAs/BHAs/retinoids helps your correction settle evenly.
Tools that make blending easier
Using the right tools turns small amounts of product into seamless, skin-like results.
- Soft, clean mitt: A plush mitt evens pressure and picks up excess before it can streak. Keep one for application and one dry, clean mitt purely for blending edges and fixing little mistakes.
- Detail brush: For ankles, wrists and across the foot, a clean, dense brush helps sweep away excess and lay down micro-thin top-ups with control.
- Dedicated remover: Keep a remover on hand for quick do-overs on wrists and knuckles; it’s faster and gentler than over-exfoliating.
If you’re building your at-home kit, pairing a soft mitt with a reliable remover and a buildable gradual formula gives you everything needed to fix, finesse and finish your glow. Try this trio: THE REMOVER to reset, a gradual tint like THE GRADUAL TANNING LOTION to rebalance depth, and our luxe DUAL SIDED EXFOLIATING MITT for the gentlest possible texture prep.
Troubleshooting: common patchy tan scenarios
“My forearms look pale but my hands are dark.”
Lift a little colour from hands with remover, then apply a thin layer of gradual tan from elbow to wrist. Use the residue over the backs of hands only. This visually reunites the limb so the hands no longer look disconnected.
“I’ve got a dark band where my leggings end.”
Friction likely sped up fade below the seam. Buff the band softly after a lukewarm shower. Apply gradual tan across the whole lower leg to avoid a new line, then choose looser fabrics while it develops.
“My knees look patchy a few days in.”
Focus on hydration morning and night for two days, then apply a micro-layer of gradual tan around the knee, passing only once lightly over the centre with the residue on your mitt.
“There’s a pale window on one shin I can’t seem to fix.”
Use a remover to blur the edges of the pale patch, rinse, dry fully, then apply a thin veil of gradual tan over the area and a palm’s breadth beyond. Repeat the next day if needed.
Kind habits that make all the difference
- Pat dry after showers. Rubbing with a towel can create uneven fade. Patting keeps colour where it belongs.
- Hand care timeout. After application, avoid hand washing for as long as possible. When you do, use cool water and a gentle cleanser.
- Moisturise before bed. Night-time hydration helps colour settle and fade evenly while you sleep.
When to start fresh
If you’re correcting more than you’re enjoying, reset. A calm, two-night restart — remover, then moisturise, then light reapplication — is often quicker and yields a more refined result than days of micro-corrections. Think of it as a kindness to your skin and your schedule.
The take-home
Patchy tan is almost always a texture and routine story — and that’s encouraging, because both can be changed. Smooth what’s rough, re-tint with precision, and lock in moisture. Keep a gentle remover for do-overs, a buildable gradual lotion for micro-adjustments, and an exfoliating mitt for thoughtful prep. With these tools and techniques, your colour won’t just look more even; it will wear more beautifully, right through to the last day of the fade.